Cinnamon Girl turns 5!
I can't believe today's my 5th blogiversary! Five years, wow time sure does fly by!...specially when you're having fun and doing one of the things you love the most: baking and eating homemade treats. I've been looking back at old recipes and, man! I've learned quite a lot of things food and photography wise. Yet I feel like there's so much work to do, because every recipe is a new little challenge to me, when I'm shooting a new recipe I always try to take better pictures each time...to improve and always move forward. I'm an hyper-perfectionist and that makes the whole blogging experience quite stressful certain days (not to mention the deadline panic). 'I should have tried the other frosting'...or 'this picture is out of focus, dammit!'...or 'I need a better camera'...or 'did I really capture the moisture of this brownie?', all these questions and many more pop into my mind every time right after I hit the "publish" button. But at the same time there's a great feeling of accomplishment, to see (and taste!) that idea you had in your mind come into life is awesome and so much more when the outcome is far better than expected. Yes, there are also lots of kitchen 'experiments' that go straight to the trash and days when I simply want to throw out the window that underbaked cake and smash my oven like there's no tomorrow.
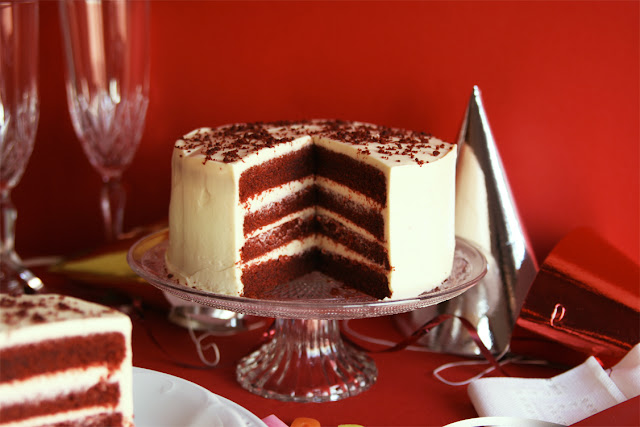
But what happened when I sliced this Red Velvet cake was pure magic and love at first sight. Honestly, this is one of the cakes I'm most proud of! I love how the layers came out so even and the frosting so velvety smooth. Like I've said before, it was one of those recipes when the results are far better than expected even though I wanted to bake a vegan cake at first, and was quite hesitant to use butter. Specially now that I'm trying to eat as healthier and fat-free as possible right before the Christmas feasts begin. My sister convinced me after a long conversation because it was also her birthday and she wanted something decadent, in her own words: "something I'd like to stuff my face with", hahah. She then took her favorite cookbook 'Vintage Cakes' by Julie Richardson and picked the Red Velvet Cake (in my next life I want a little sister that delivers homemade desserts, ha).
I made a few adjustments to the recipe and opted for a different frosting but I was absolutely blown away by the delicious taste: velvety, extra tender, flavorful and perfectly sweet. The maple cream cheese frosting is to die for!
I'm glad I made up my mind and finally baked this glorious cake to celebrate my blog's fifth anniversary. Last but not least, thank you all so much from the very bottom of my heart.
Here's to many more years to come!

Red Velvet Cake
(recipe adapted from 'Vintage Cakes' by Julie Richardson)
Ingredients
(6 to 8 servings)
- For the cake:
1 1/4 cups white pastry flour.
1/4 cup pure cocoa powder.
1 teaspoon baking powder.
1/2 teaspoon himalayan pink salt.
1/3 cup plus 2 teaspoons sunflower oil.
1 teaspoon pure vanilla extract.
1/2 tablespoon red gel food coloring.*
85 g (3 ounces) organic unsalted butter, at room temperature.
185 g (6.5 ounces) organic cane sugar.
2 free-range eggs, at room temperature.
1 free-range egg yolk, at room temperature.
1/2 cup buttermilk, at room temperature.
- For the maple cream cheese frosting:
1 cup (227 g/ 8 ounces) organic unsalted butter, at room temperature.
453 g (1 pound) cream cheese, at room temperature.
1/2 tablespoon pure vanilla extract.
2/3 cup grade B maple syrup.
* I used Wilton's 'red-red'.

Directions
- To make the red velvet cake:
Grease two 6 in x 4 in (15 x 10 cm) round cake pans and line the bottoms with parchment paper. Preheat oven to 350 ºF (180 ºC).
In a small mixing bowl, sift together the flour, cocoa, baking powder, and salt, mix all the ingredients by hand with a wire whisk to aerate the mixture.
In the bowl of a stand mixer cream the butter and sugar together on medium-high speed until fluffy, about 5 minutes. Add in the oil, vanilla and food coloring with the mixer on low speed.
You might need to stop the mixer frequently and scrape the sides of the bowl to ensure the food coloring is completely blended into the batter.
Blend in the eggs and egg yolk one at a time, on medium-high speed.
With the mixer on low speed, add the flour mixture in three parts, alternating with the buttermilk in two parts, beginning and ending with the flour (flour-buttermilk-flour-buttermilk-flour). Mix until just barely blended and complete the blending by hand with a rubber spatula, this way we make sure not to overbeat the batter.
Divide the batter evenly into the prepared pans and tap the pans on the counter a few times to get rid of air bubbles on the surface.
Bake for 30 minutes approximately, until a cake tester inserted in the center of the cake comes out clean. Cool on a rack for 30 minutes before removing from the pans. Continue to cool on a rack, top side up, until they reach room temperature. Transfer the cake to the fridge for a couple hours, I find it easier to divide into layers when the cake is well chilled.

- To make the maple cream cheese frosting:
In the bowl of your stand mixer fitted with the paddle attachment, beat the butter on medium speed for about 1 minute. Add in the cream cheese and continue beating until the frosting is smooth and no big lumps are visible (around 1 more minute). Finally blend in the vanilla extract and maple syrup and mix on medium-high speed, scraping the bowl a few times to make sure the frosting is lump-free. It should look smooth and thick enough to use with a piping bag. If you want it to have a more thick consistency reduce the amount of butter to 3/4 cup approximately until you reach the desired thickness. If not used immediately, store in the refrigerator for up to one week.

- To assemble the cake:
Once the cake has set in the fridge for a couple hours (or preferably overnight) we can start the assembling. Cut each cake in half to get four even layers and spread the frosting using a metal spatula, repeating the process until all the layers are frosted. With this frosting recipe you will have enough to fill, frost and decorate.
Crumb coat the cake with a thin layer of the frosting, let it set in the fridge for 30 minutes approximately and frost the entire cake with the rest of the cream cheese frosting. First cover the sides of the cake and then spread the remaining over the top.
If desired, you can pipe the leftover frosting and add some decorations. I opted for a different style: cut a super thin layer of cake, crumbled into a food processor and lightly toasted them in a frying pan.
Then I added the toasted sprinkles on top of the cake and voilà!
Store the cake in the refrigerator and let it soften at room temperature around 15 minutes before serving.


Wow what an epic cake looks so amazing Gemma and so moist. Love the sound of maple cream frosting. Happy 5th blog birthday. xx
ReplyDeleteThanks Rebecca! :-)
Deletexoxo
Gemma t'ha quedat un pastís fantàstic! Quina perfecció en les proporcions!! :) Enveja pura! I 5 anys... bufffff... aviat està dit però és tota una feinada (molt ben feta per cert) i moltes hores a la cuina: FELICITATS!!!!!
ReplyDeletePetons reina
Moltíssimes gràcies Dolors! Tu saps tan bé com jo tota la feinada que hi ha darrera d'un bloc. ;-)
DeleteMolts petons per a tu també, maca!